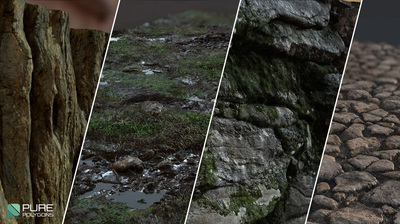
Simple Tips, Tricks, and Breakdowns for how I created some of my organic textures.
Feel free to take a deeper look at these textures in the bundle pack available in the store.
Feel free to take a deeper look at these textures in the bundle pack available in the store.
Textures Bundle Pack
Please follow along for some learning fun! :)
|

|
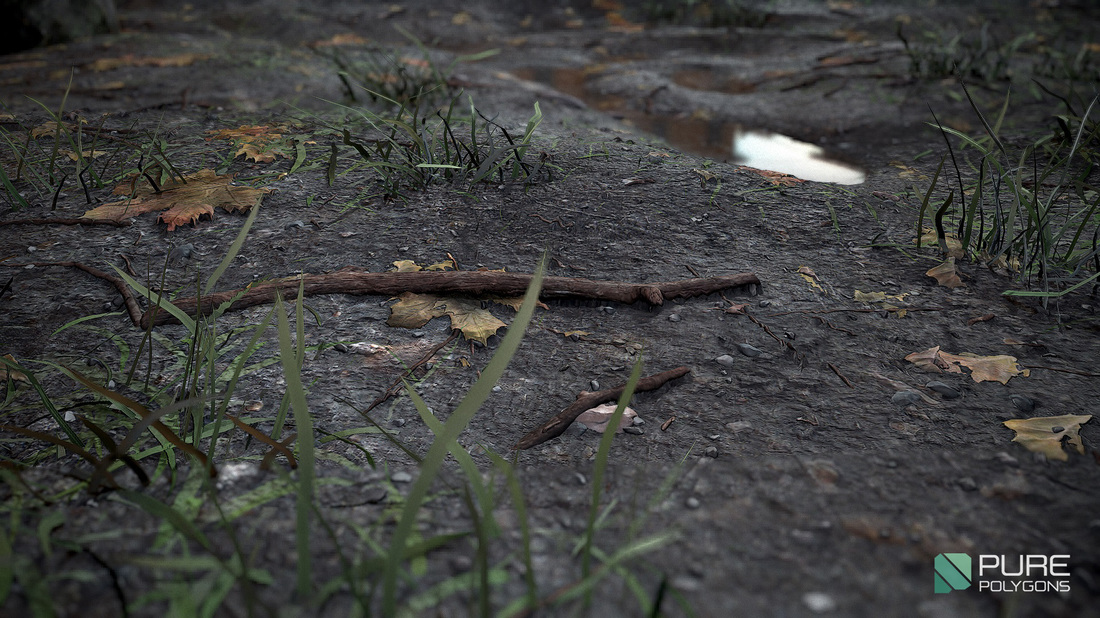
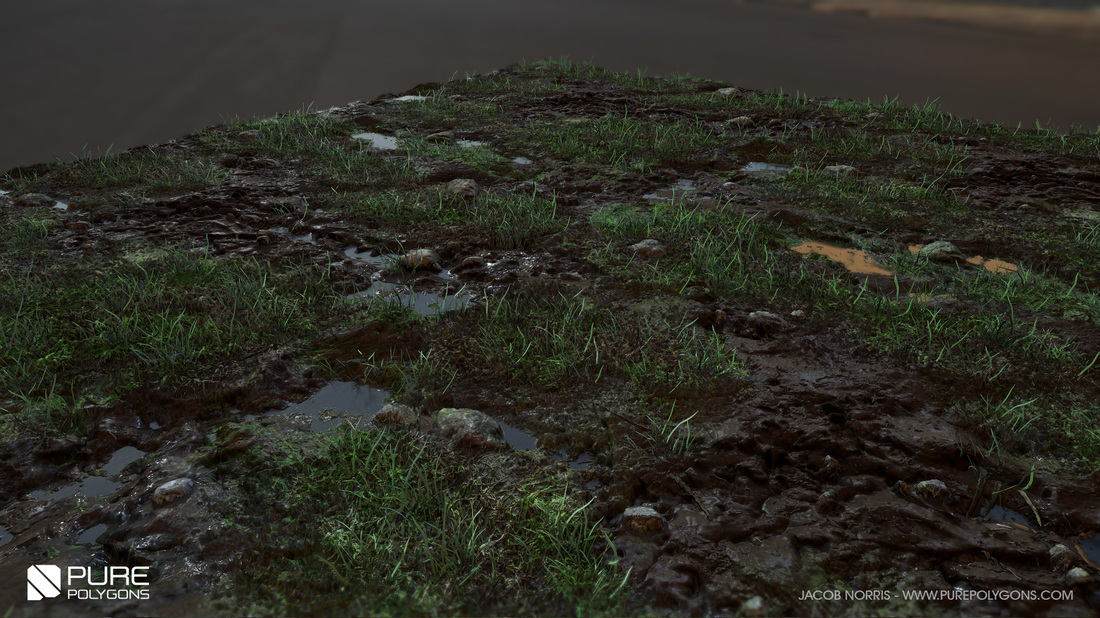
Muddy, Grass, Ground, with puddles breakdown
In order for these techniques to be used to their full potential, I would recommend checking out the Zbrush Tiling Texture youtube series that I have posted up in another blog post here on the site.
Please take a look.
Zbrush Tiling Texture Blog Post
Please take a look.
Zbrush Tiling Texture Blog Post
Please Continue Reading...
So I started off by sculpting mud in Zbrush just as you normally would. Getting some cool shapes and some height variation into the texture. I then sculpted a few rock subtools which I placed around the mud in different areas.
As for the grass, I created this little guy in Maya and brought it into Zbrush to start working with.
As for the grass, I created this little guy in Maya and brought it into Zbrush to start working with.
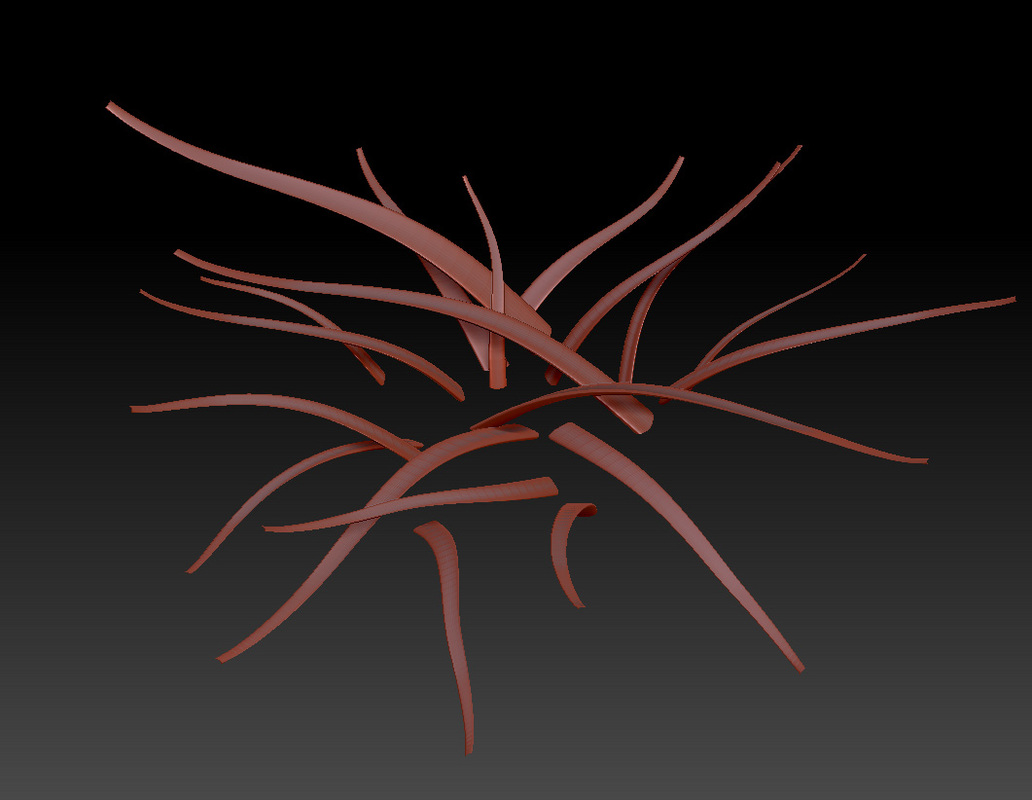
From there I simply duplicated the subtool of the grass multiple times, rotating and scaling it all over the mud, moving it in front and behind the mud to get different height variation. After I had a pretty good coverage of the grass on top of the mud, I combined all of the grass subtools and did some quick pushing and pulling with different brushes. Used the spiral brush to spin some of the blades of grass and the move brush to pull and push different areas until it looked the way I wanted it. I then rendered it as a different color within Zbrush so that I could get a quick select for it in photoshop to texture it and paint it here is what the zbrush looked like.
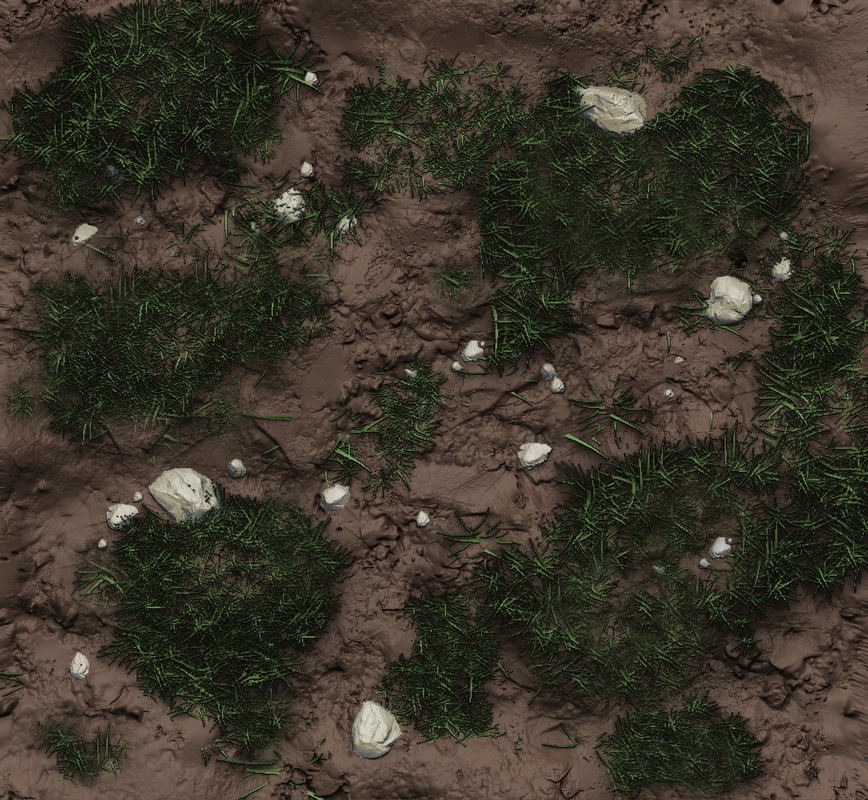
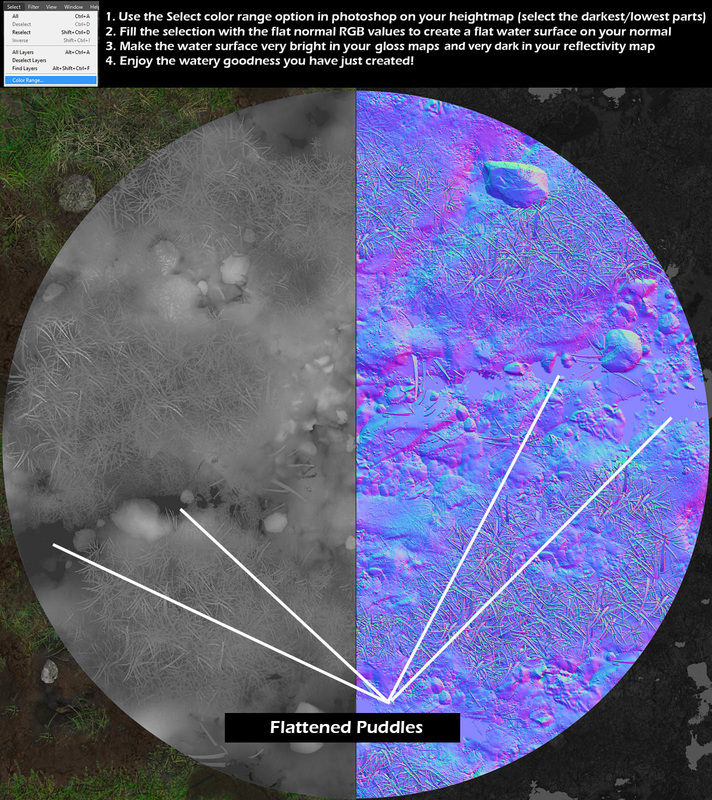
Moving along now, I'll talk a little bit about the puddles. After I finished the sculpt I exported the height map and brought it into photoshop. (This could have been done much easier in zbrush but the puddles were a secondary thought that I ended up adding in photoshop later) So here is a quick image of how I created the puddles within photoshop.
Lastly here is a nice gif for you guys showing off how much the tesselation on the grass helps to give it that effect. The effect can also be achieved with a Parallax, but I chose to go with Tesselation for this one as it tends to give me better shadows and AO in rendering. A with and without tesselation gif image.
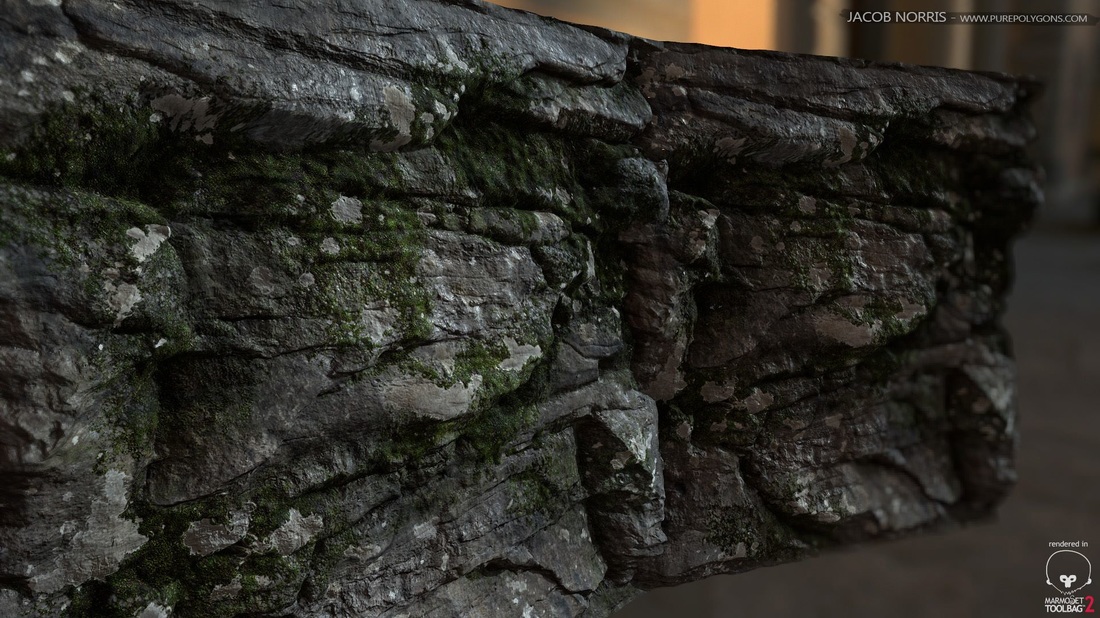
Rock, Cliffside wall,, Moss Breakdown
Again, please be sure to follow along with the tiling texture setup in Zbrush.
Here is the blog post again.
Zbrush Tiling Texture Setup
This technique allows me to create a tileable texture from within Zbrush and helps me save a lot of time fixing seams in Photoshop later.
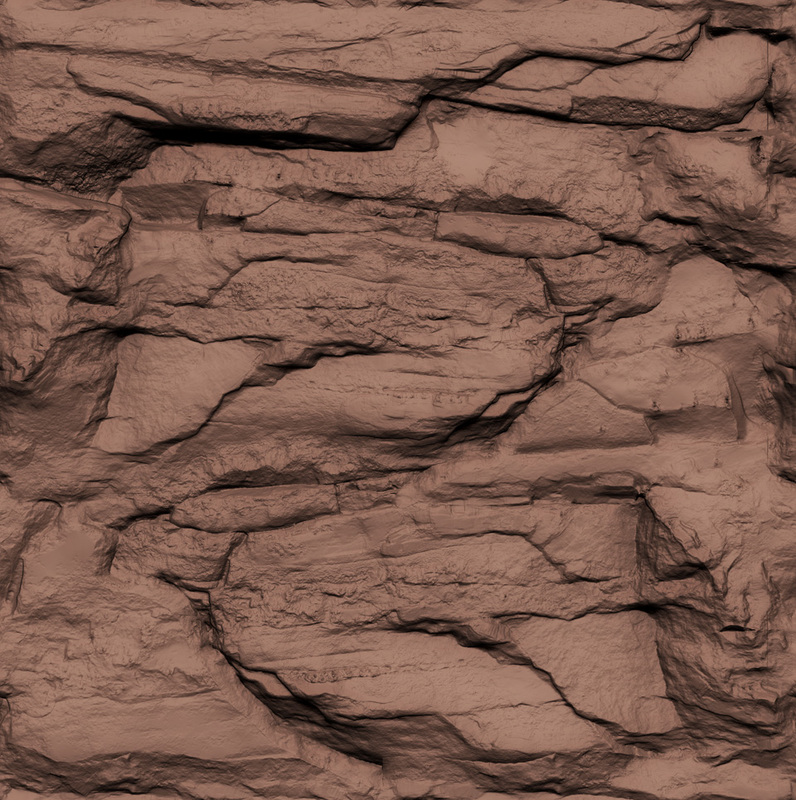
- So using this tiling/wrapping brush technique I start off with a flat plane for the rocks and begin sculpting large shapes with the clay brush. I am still in a decently low poly mesh right now around 20k. This allows me to get the large forms in and the basic details for the rocks that I want with quick iterations pushing and pulling. While I am doing this I am using the Trim Dynamic brush to polish off areas and get some nice sharp edges for the rocks.
- After I have a pretty good base mesh to work from on the rocks I think start adding a lot more poly's and get up into the millions. Here I am using a variety of brushes to get details in. I personally like the MalletFast2 brush which I use to chip a lot of edges off. While doing this I am still using the trim dynamic brush to polish areas, I am also using the noise brush in a spray mode to get some nice rocky crevices and details across the surface. I'm also using the slash 3 brush for some of the cracks in combination with the MalletFast brush. At this point I am about here in detail.
Here is the blog post again.
Zbrush Tiling Texture Setup
This technique allows me to create a tileable texture from within Zbrush and helps me save a lot of time fixing seams in Photoshop later.
- So using this tiling/wrapping brush technique I start off with a flat plane for the rocks and begin sculpting large shapes with the clay brush. I am still in a decently low poly mesh right now around 20k. This allows me to get the large forms in and the basic details for the rocks that I want with quick iterations pushing and pulling. While I am doing this I am using the Trim Dynamic brush to polish off areas and get some nice sharp edges for the rocks.
- After I have a pretty good base mesh to work from on the rocks I think start adding a lot more poly's and get up into the millions. Here I am using a variety of brushes to get details in. I personally like the MalletFast2 brush which I use to chip a lot of edges off. While doing this I am still using the trim dynamic brush to polish areas, I am also using the noise brush in a spray mode to get some nice rocky crevices and details across the surface. I'm also using the slash 3 brush for some of the cracks in combination with the MalletFast brush. At this point I am about here in detail.
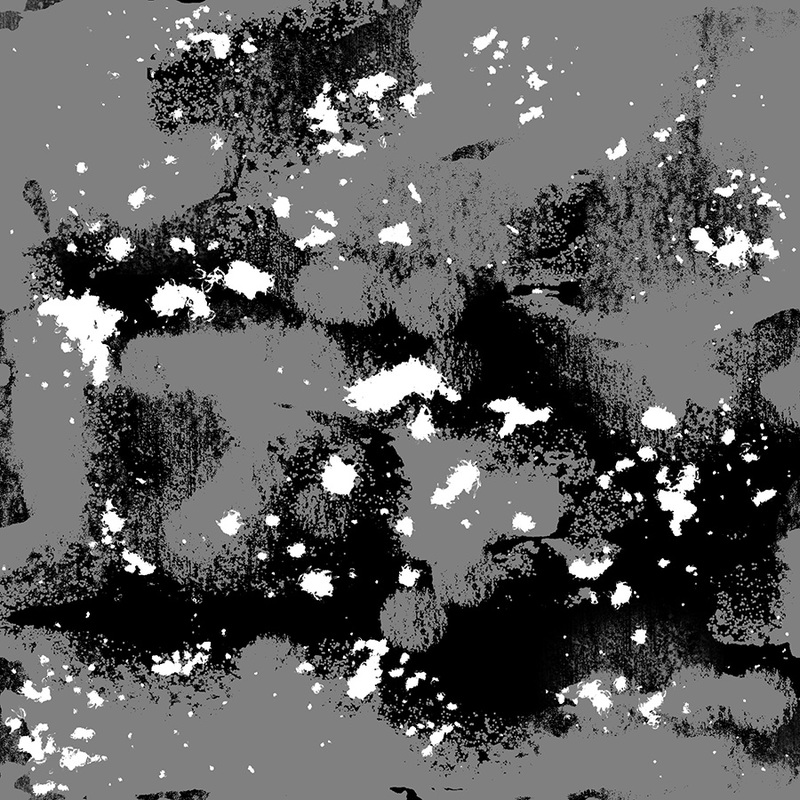
Now I want to start adding the moss and the light patches across the rock. So I first Grabdoc my rocks so that I can take this into photoshop and start creating a mask for where I want moss to be placed. I have an image of my rock sculpt in photoshop now and I am making the moss a black color mask and the white areas a white colored mask. I will be bringing this back into zbrush to do something special with it. Here is an image of the mask I created for my moss and patches across the rock. I will be using it to get some nice bevels on my rocks in zbrush. (This can also be done in post using crazybump or ndo, but i wanted to do as much as I could in zbrush)
PS: Don't ask me why, but whenever I import my mask into Zbrush, I have to flip the image vertically(not rotate, FLIP!) So I bring the alpha in upside down and it shows up correctly on the mesh, maybe someone can explain to me why this happens? But it is a necessary step for myself.
PS: Don't ask me why, but whenever I import my mask into Zbrush, I have to flip the image vertically(not rotate, FLIP!) So I bring the alpha in upside down and it shows up correctly on the mesh, maybe someone can explain to me why this happens? But it is a necessary step for myself.
|
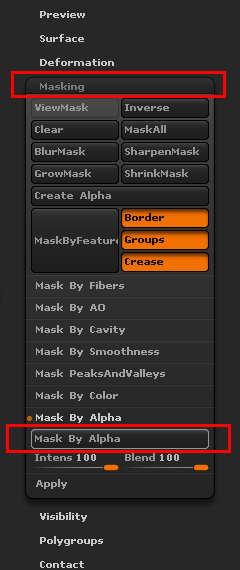
Now that I am back in Zbrush I am going to import my alpha/mask that i just created in photoshop. I then want to mask my zbrush tool using the alpha that i created in photoshop. So I go here.
|
|
|
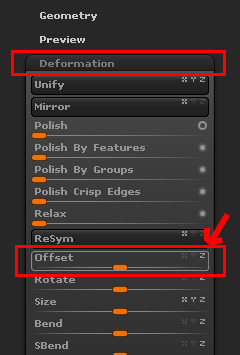
After my ztool is now masked using the alpha that i made in photoshop, I want to bevel that detail into the mesh. Whatever is grey in my alpha will not move at all. Whatever is black will be pushed back into the mesh and whatever is white will be pushed out towards the camera just like a height map. So using my mask I go to the deformation tab in zbrush and offset my mesh in the Z-Axes. Because for me, the Z-Axis is facing the camera so it will push and pull things properly.
|
|
I then offset the mesh until I get the desired amount of bevel from the alpha that is what I want. Since my ztool is still masked I can now use this mask to sculpt in the moss detail without affecting the rock areas. So I simply went over all of the moss with the noise brush. Nothing really special here. This is the resulting zbrush sculpt after the deformation mask was applied and the noise was sculpted on top of the moss.
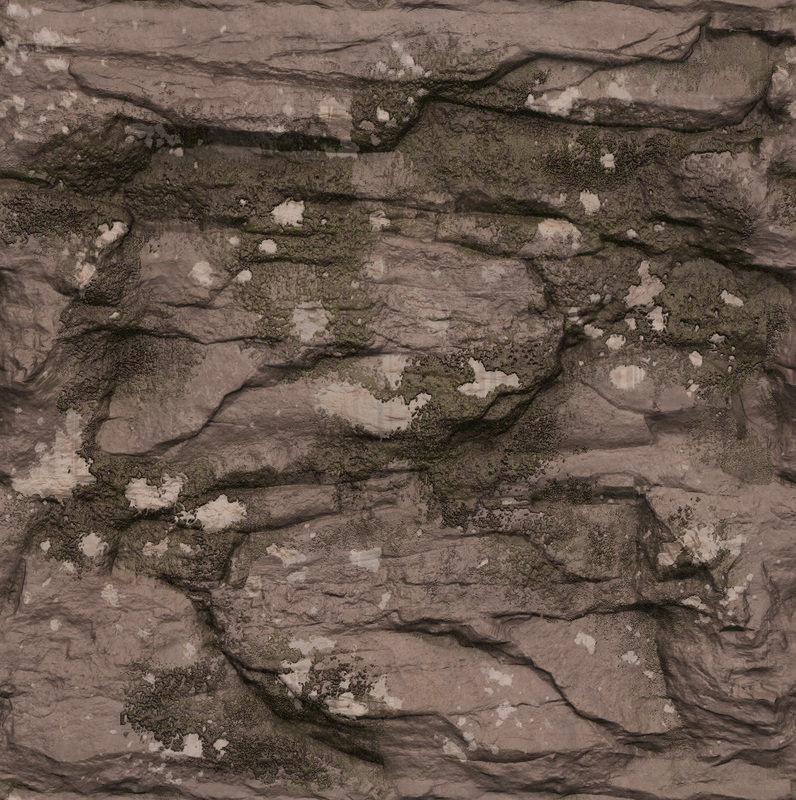
From there it's just normal photoshop texturing and I already have a nice mask for photoshop to texture in my moss detail I hope this helps and it's not a jibber jabber of text/information that is out of context or doesn't make sense.
Thanks for reading guys and I hope you enjoyed it!
- Jacob Norris
- Jacob Norris


 RSS Feed